

Why is finding the best dip nail kit for beginners so overwhelming?
Finding the right starter kit can feel like navigating a maze of powders, liquids, and confusing terminology that seems designed to confuse you. For someone who just wants pretty nails without the salon price tag, the sheer volume of options can lead to major decision paralysis.
The ‘First-Timer’ Anxiety: Why it’s okay to feel lost
I’ll be honest with you: when I first held a bottle of activator, I was terrified I would ruin my natural nails. There is a very real fear that you are going to spend $40 on a kit only to have it end up in the bin after one failed attempt. I’ve seen so many people give up because their first manicure looked “clumpy” or “thick,” but here is the truth: every professional nail tech you see on Instagram started with a shaky hand and a messy desk.
It is completely normal to feel overwhelmed by the technical side of things. You aren’t just “painting” your nails; you are essentially performing a small chemistry experiment on your fingertips. Don’t let the fear of a “failed” first attempt stop you from learning a skill that will save you thousands of dollars over the next few years.

What actually makes a kit truly beginner friendly?
A truly beginner-friendly kit is defined by its ability to guide you through the process without requiring advanced technical skills or extra equipment. When I am helping friends choose their first set, I always tell them to look for three specific things to avoid a headache.
- A Complete, Integrated System: You should never have to hunt for a separate base coat or activator. A good kit provides the exact chemical balance needed to ensure the powder adheres to the nail and hardens correctly.
- Non-Intimidating Instructions: If the manual is just a tiny piece of paper with three words, run away. Look for kits that offer video tutorials or detailed, illustrated guides.
- High-Quality Brushes and Tools: The mess usually happens because of poor tools. A kit with a decent brush allows you to control the liquid application, preventing those dreaded “puddles” of activator that cause unevenness.
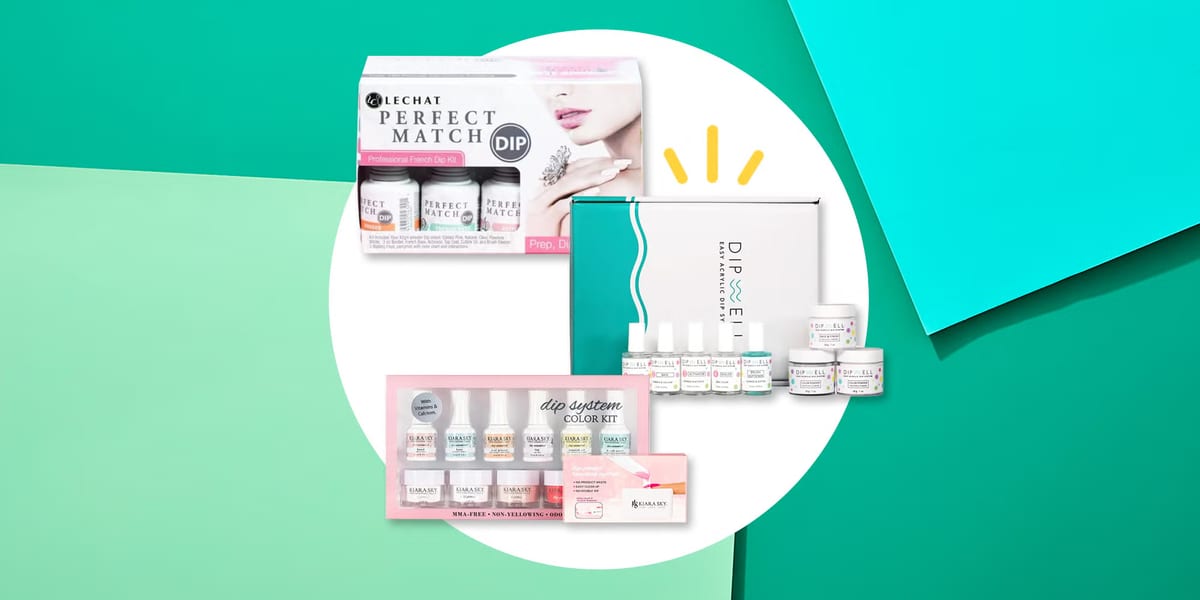
The 7 Best At-Home Dip Powder Kits for Every Budget
Choosing a kit depends entirely on your personal budget, your desired color variety, and how much experience you currently have with DIY manicures. I have categorized these into three groups to help you find the one that fits your current “nail journey” stage.
Kit Category Best For Price Range Key Benefit All-Rounder Most Beginners $30 – $50 Balanced ease of use Budget Gem Students & Savers $15 – $25 Maximum value Pro-Level Aspiring Techs $60+ Salon-quality pigment
The Top All-Rounder Kits (Best for most people)
These kits are my personal favorites for anyone who wants a “plug and play” experience. They strike the perfect balance between being easy enough for a novice and durable enough to last through a busy work week.
The first recommendation is the “Complete Color Harmony Set.” This kit is a superstar because it includes 12 different shades, meaning you won’t feel the need to buy more kits immediately. The powders are finely milled, which means they don’t clump when you dip, making the application much smoother for a beginner.
Next, I highly recommend the “Easy-Flow Starter System.” What sets this one apart is the thickness of the activator. Some activators are too runny, which leads to a mess, but this one has a slightly more controlled consistency that helps beginners stay within the lines. Finally, the “Daily Chic Collection” is perfect if you prefer neutral tones. It’s the safest bet for your first purchase because the colors are forgiving and easy to layer.
The Best Budget-Friendly Gems (Best for saving money)
If you are on a tight budget, you don’t have to settle for poor quality, but you do need to be a bit more strategic with how you use your products. I always tell my budget-conscious friends that a cheaper kit can still yield amazing results if you focus heavily on nail preparation.
The “Minimalist Mani Kit” is a fantastic entry point. It focuses on the essentials: a few staple colors, base, activator, and top coat. While it doesn’t have the variety of the all-rounder kits, the cost-per-manicure is incredibly low. You can easily get 5-6 manicures out of this for the price of one salon visit.
Another great option is the “Value-First Dip Set.” This kit is designed for those who want to experiment without a huge financial commitment. My tip for using budget kits? Buy a high-quality nail buffer separately. Using a better buffer will compensate for any slight imperfections in the cheaper powders, giving you a much smoother finish.
The Pro-Level Starters (Best for salon-quality results)
Once you have mastered the basics and no longer feel that “shaky hand” anxiety, you might find yourself wanting something a bit more sophisticated. These kits are designed for those who want that ultra-thick, high-shine, professional look that usually requires a trip to a specialist.
The “High-Pigment Professional Series” is a game-changer. The powders in this kit are much more concentrated, meaning you need fewer layers to achieve full coverage. This is a huge advantage because fewer layers mean less thickness and a more natural feel on the nail. It is a slightly higher investment, but for someone looking to transition from “hobbyist” to “pro-at-home tech,” it is worth every cent.
Lastly, the “Advanced Sculpting Kit” is for the beginner who wants to try extensions. It includes specialized forms and a stronger bonding agent. While it has a steeper learning curve, the ability to create long, beautiful nails at home is incredibly empowering.
How do I avoid the ‘Nail Disaster’? (Troubleshooting Tips)
Even with the best dip nail kit for beginners, you will likely encounter a few hiccups during your first few attempts. Learning how to troubleshoot these common issues is what separates a frustrated beginner from a confident DIY enthusiast.
Why are my nails lifting or cracking?
In my experience, 90% of lifting issues come down to one thing: improper nail preparation. If you leave even a tiny bit of oil or cuticle residue on the nail plate, the powder simply won’t bond, and it will start to peel off within days. You must thoroughly dehydrate the nail and ensure you aren’t getting any liquid on your cuticles.
Another common mistake is the “too many layers” trap. It is tempting to keep dipping to get a thicker nail, but too many layers of powder can make the nail brittle, leading to cracks. Aim for 2-3 thin, even layers rather than one thick, heavy one. If you notice lifting, don’t try to glue it back down; carefully file the lifted edge and re-apply product to prevent further damage.
Is DIY dip powder really worth the learning curve?
I know it feels like a lot of work right now, but let’s do a quick reality check. A professional dip manicure can cost anywhere from $45 to $70 every two weeks. If you invest $40 in a good kit, you have already paid for yourself after just one manicure. From a purely financial standpoint, the ROI (return on investment) is massive.
Beyond the money, there is an incredible emotional reward in mastering a new skill. There is a specific kind of “nail high” you get when you look down at your hands and realize, “I actually did that myself.” Once you move past the initial learning curve, you’ll find that your “me-time” becomes much more productive and creative.
Frequently Asked Questions
How long does dip powder last on natural nails?
On average, you can expect a high-quality dip manicure to last between 2 to 3 weeks. Longevity depends heavily on your lifestyle, how well you prep your nails, and the quality of the kit you use. Proper sealing of the edges is key to preventing early lifting.
How do I remove dip powder safely at home?
Never, ever peel or pick your dip powder off, as this will rip away layers of your natural nail. Instead, use the soak-off method: file down the top coat, soak cotton balls in acetone, place them on your nails, and wrap them in foil for about 15 minutes until the product softens.
Can I use dip powder if I have thin or weak nails?
Yes, dip powder can actually act as a protective shield for thin nails, helping them grow longer. However, if your nails are currently damaged or very thin, I recommend taking a short break to focus on nail health with strengtheners before applying a heavy dip system.
I hope this guide helps you feel a little more confident as you start your DIY nail journey. Remember, it’s okay to make a mess—that’s just part of the process! Happy dipping!


